USING GAME RIPS IN COSPLAY
I realized I haven’t actually posted anything to the blog in…well…ever? So allow this to be my first post!

Today I will talk about the use of “game rips” in cosplay and prop making/reproduction. What is a “game rip” you ask, you delightfully curious straw person you? Well, it is a 3D model extracted from a game (or some other software).
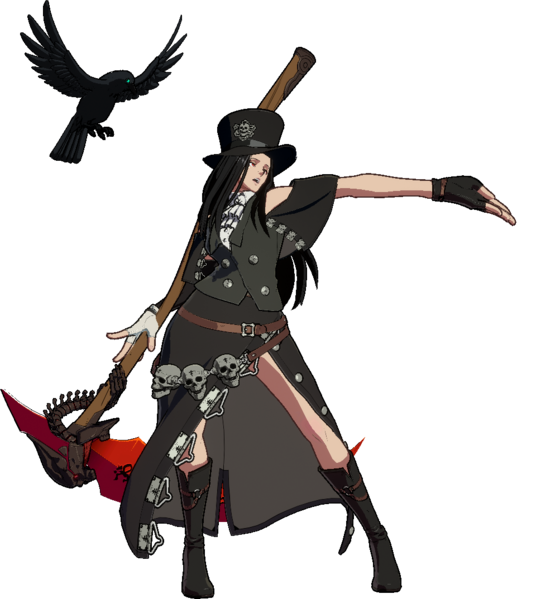
Guilty Gear Strive’s Testament with their scythe 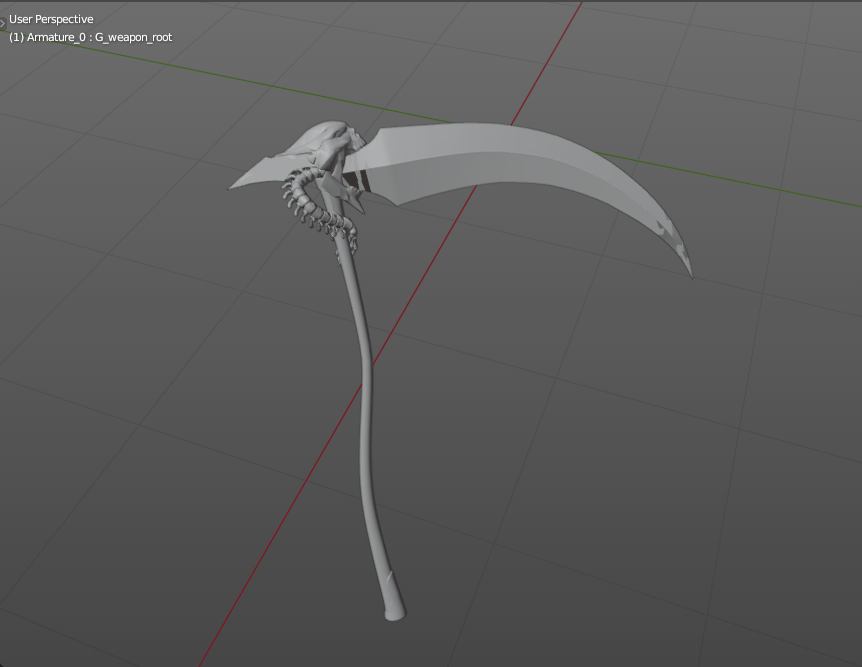
Testament’s scythe as ripped into Blender 3D
Brief History of Polygons and Cosplay
Traditionally, polygonal models ‘ripped’ or extracted from games were extremely simplistic, as the hardware couldn’t keep up with too much geometry. The artists would therefore use texturing(basically paint) to fill in the details the 3D model couldn’t have. This is still done, of course, but now 3D models are a lot more intricate to help not only/necessarily for realism but for things such as special effects and lighting.
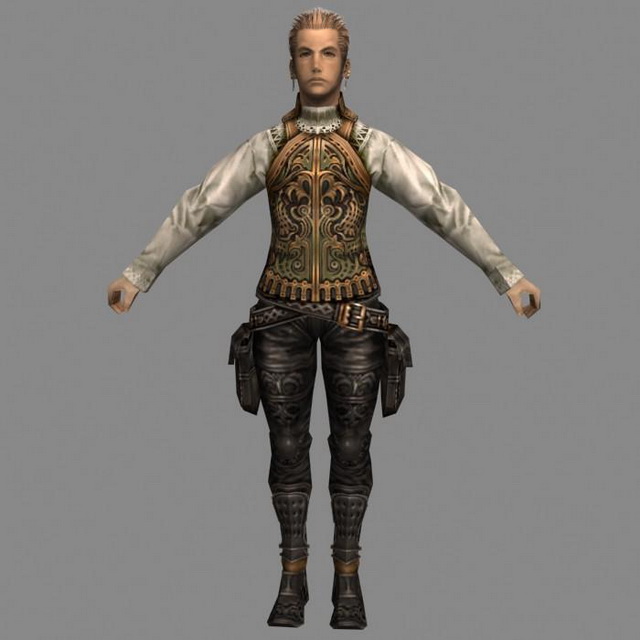
Sure this dapper fellow looks like he’s all detailed geometrically but if you took off the textures he’d look like a thigh gapped milk carton.
That isn’t to say low poly models are useless. In fact, a traditional use for them has been converting them to papekura.
I’m sure that isn’t glue holding that thing together, but pure papercut blood.
Skyrim helmet model by Twitter user @Arturohdxd

Papekura basically means papercraft. And for projects like helmets and armour it can be used to great effect to get a general shape going, to later be replaced/covered by foam, bondo, fiberglass, eva foam clay, whatever, which will be in sufficient thickness to later be smoothed out, so the sharp edges won’t be as much an issue. But we’ll get to that later.
As gaming machines got higher tech with the ability to crunch more polygons per screen (with whatever hardware you could keep away from the cryptoscammers) game models started being nearly good enough for use in cosplay as-is.
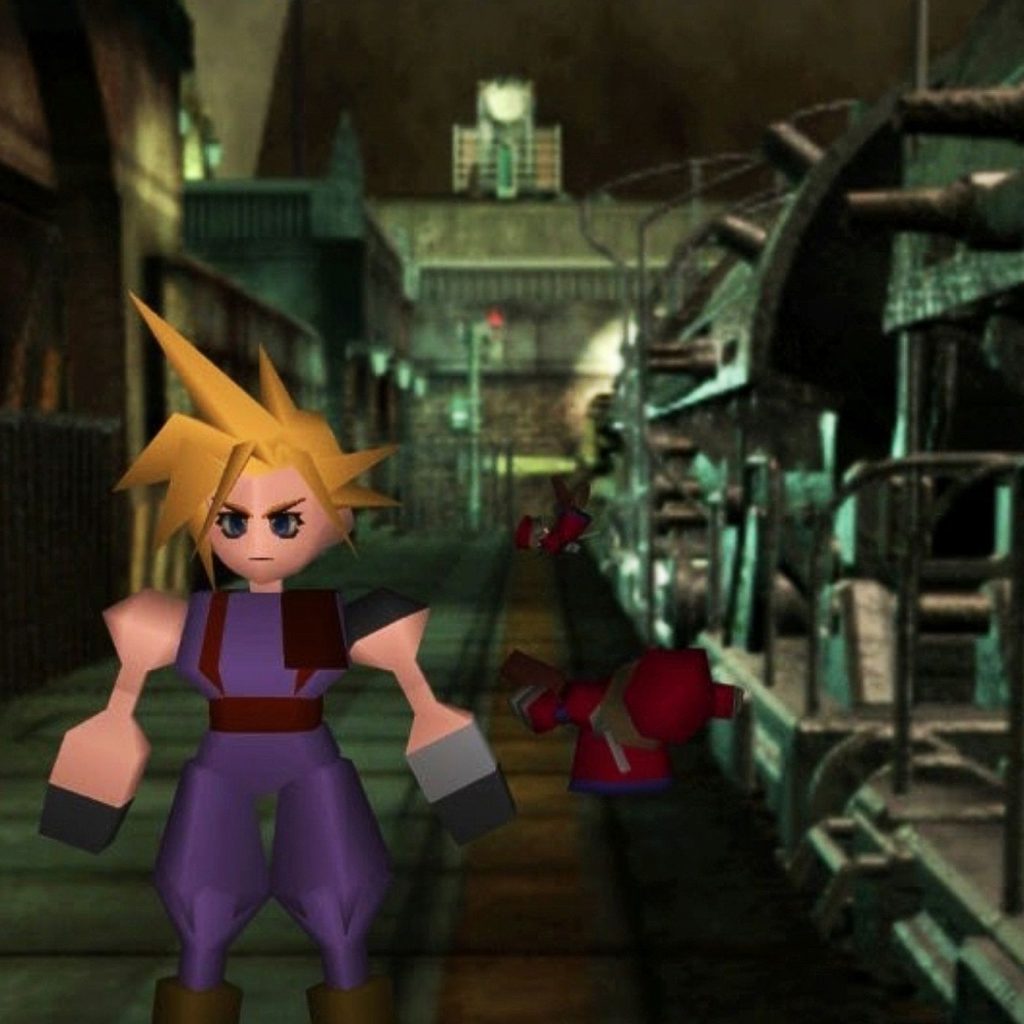
Cloud went through…a phase…in the 90s. 
Yass girl SLAY
Combine that with the easy availability of 3D printers or 3D print services and you can literally manifest some as actual tangible plastic THINGS.
So should we?
Yes, Obviously, But Also, Maybe Not?

I want to make something clear: using 3d game models in your cosplay is not a cheat code. [hur hur, game pun, geddit?]
I say this because it can be a lot of work! And to even think about it, you need to be familiar with, or acquire the models from someone with the following skill sets:
- 3D modelling in software such as Blender3D or Autodesk Maya. Passive familiarity with typical 3D print finishing tools like Meshmixer won’t cut it alone [though using cutting IN Meshmixer may come in handy]
- A copy of the game or a rip from the game found somewhere online.
- You don’t get squeemish playing with various software in various states of “well obviously a UX designer didn’t make this”.
- 3D printing and slicing and an eye for what does and doesn’t work when sliced/printed OR experience with papekura, papekura tools and additive finishing materials typically reserved for auto detailing if going the low poly route.
If tools that look like this give you hives, I have terrible news for you.
“But wait”, the curious strawman exclaims, “can’t I just download the model from someone else”?
Why yes. Sometimes. If you’re lucky. And the ripper themselves fixed it up. Issue is, lots of people can rip game models, some will even sell them on Etsy as “cosplay ready!” Some of those people do great work. Others are damn dirty liars. Knowing which is sometimes non-trivial unless you have a go-to trustworthy source.
I’ll give you an example. At one point I was tasked to print a 3D model file listed as “cosplay ready”. the artist wanted $18 for the model. They even had pictures of printed shapes. They were all basic jewelry accoutrements of a popular gatcha game. I paid them the $18.
Let’s just say it wound up not being the “does great work!” variety. The model was so obviously a straight game rip the pieces sat in space as if the character model they were stuck to had simply been clicked on and deleted. Much of the geometry was impossible to print by either not being connected in any way to anything or connecting to things at the micron level, rendering them as fragile enough to break under the stress of a fart erupting from a gnat next door. On top of that, all the edges were polygon edges with no extra smoothing, meaning they were POINTY.

Dude, you literally just selected the character that was here and hit ‘delete’ and called it $18 worth of ripped data. 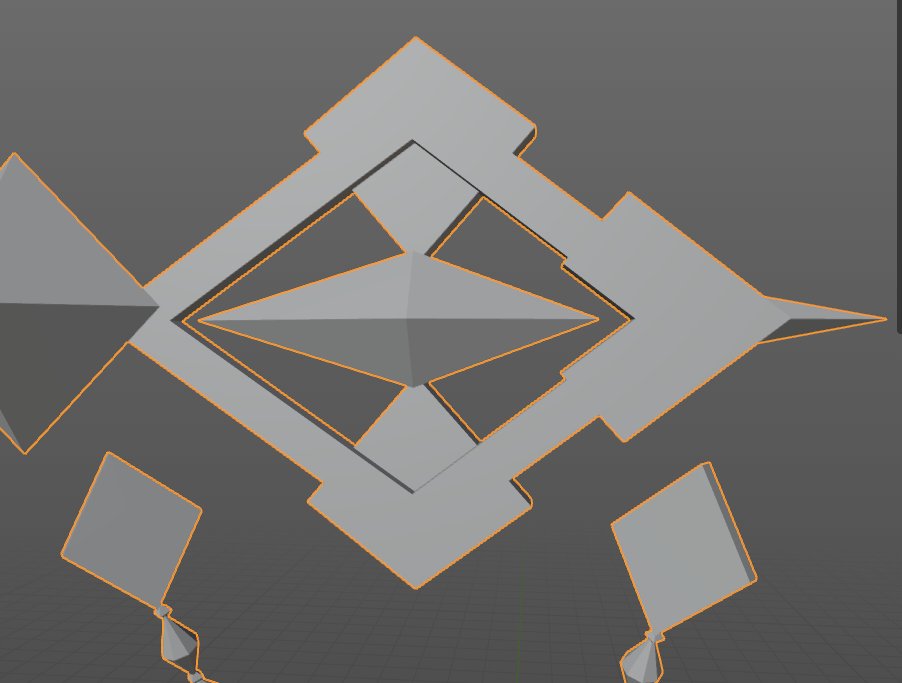
If you squint you can see the two molecules holding that center piece in place. 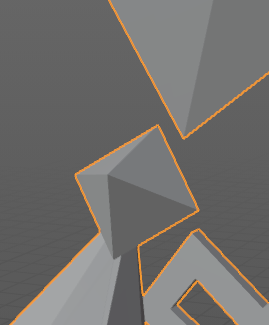
Obviously held together by the power of friendship. Again, this butthead charged $18 for this thing.
So while you CAN download or buy prepped ripped models, understand that it’s a jungle out there. And selling rips from copywritten material falls into the legal grey cornfield I won’t address here as the line of what is “transformative” isn’t straightforward.
How To Rip Game Models
This section will be short: Google it.
Honestly, googling “how to rip models from [game]” or “modding characters from [game]” will lead you to where you need. All games are different, so the methods vary.
Lots of games do share an engine, however, so the advice for, say, ripping models from Arc System Works fighting games, may apply to other titles using the Unreal Engine as well. Tools like UModel, for example, are used by multiple modding communities to grab Unreal Engine models.
The bigger the modding community of a given game, the more likely you’ll find what you need to rip the geometry out.
I Got the Model, What Now?
Great! Now, we go through a few things that are important to know about game models.
> Game modelers are optimizing for the game
A game model may look absolutely complete when looked at in the context of the game they were made for, but lots of corners are cut or things are removed to make it run better, smoother, and with less strain on the hardware. If it’s an armour piece, it may not even have a backside as it might just clip into the character itself and thus, in an effort to save on storage and unneeded processing, be bare of anything that isn’t straight up facing the camera. Equally, stuff such as plate armour, shin pads, etc… may actually be physically PART of the character model. That might not be a hat or helmet you’re looking at, it might be that character’s entire head, unless the game ever plans on removing either to show you the other side.
Regretfully, no, Samus Aran or Master Chief aren’t hiding in their powersuits. You’re playing a powersuit that occasionally has eyeballs or a piece of face attached.
As such, you may need to create additional geometry to fill in the blanks left by the game artist.

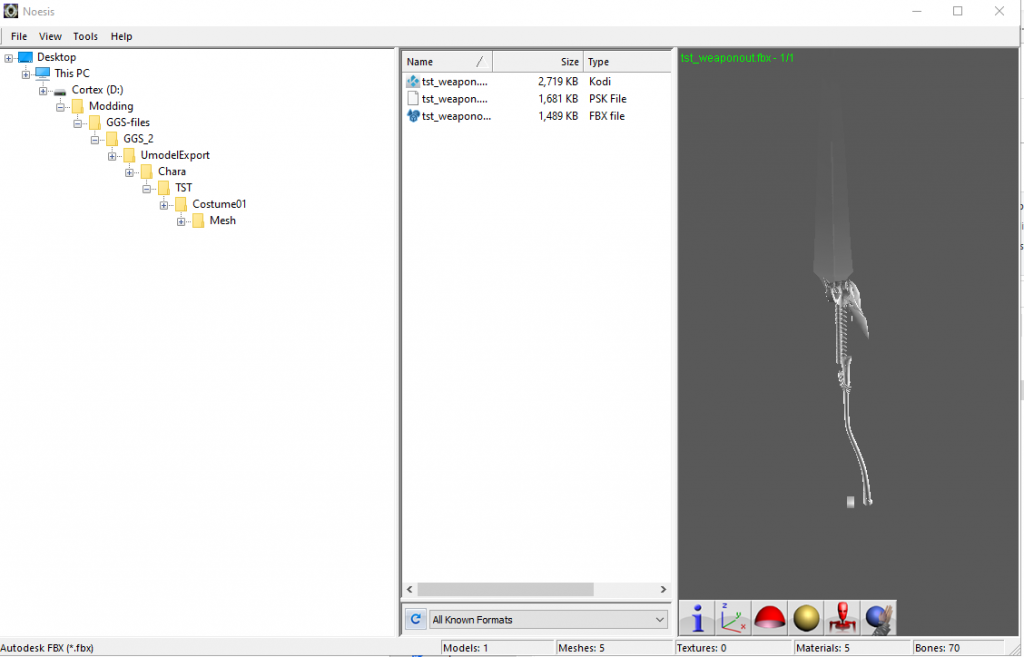
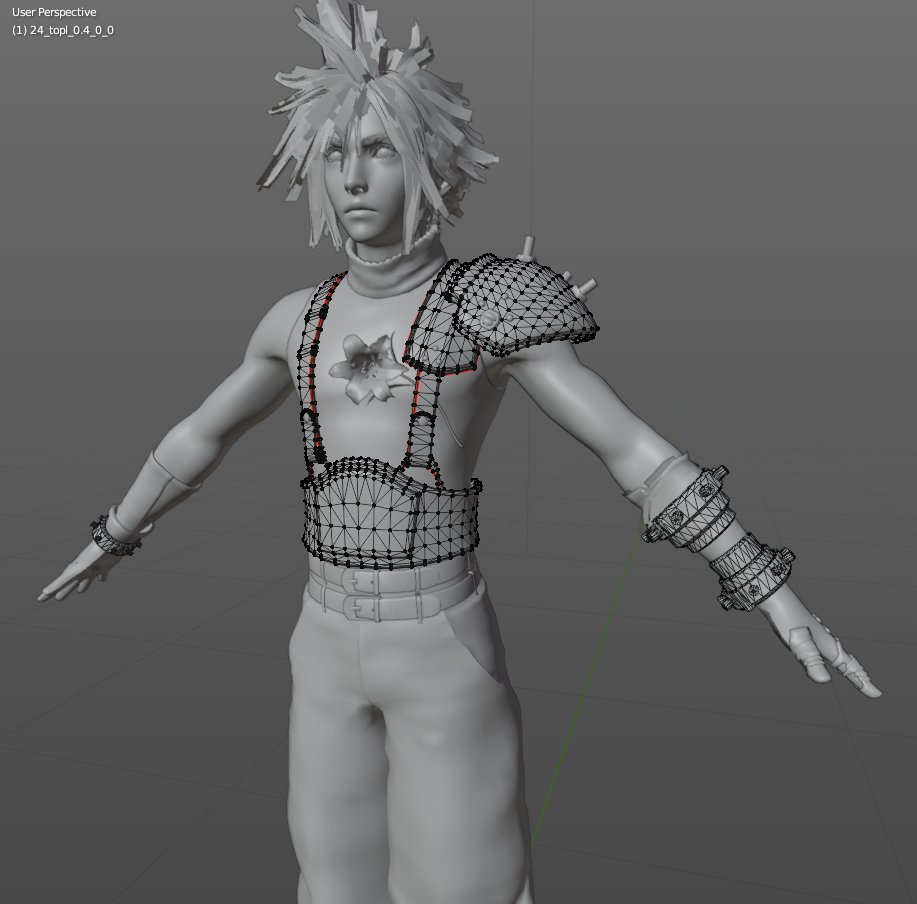
This looks like a model that is complete, but understand that he’s not wearing a glove or even clothes. He IS the clothes. Thankfully the armour is a separate set of geometry we can use. 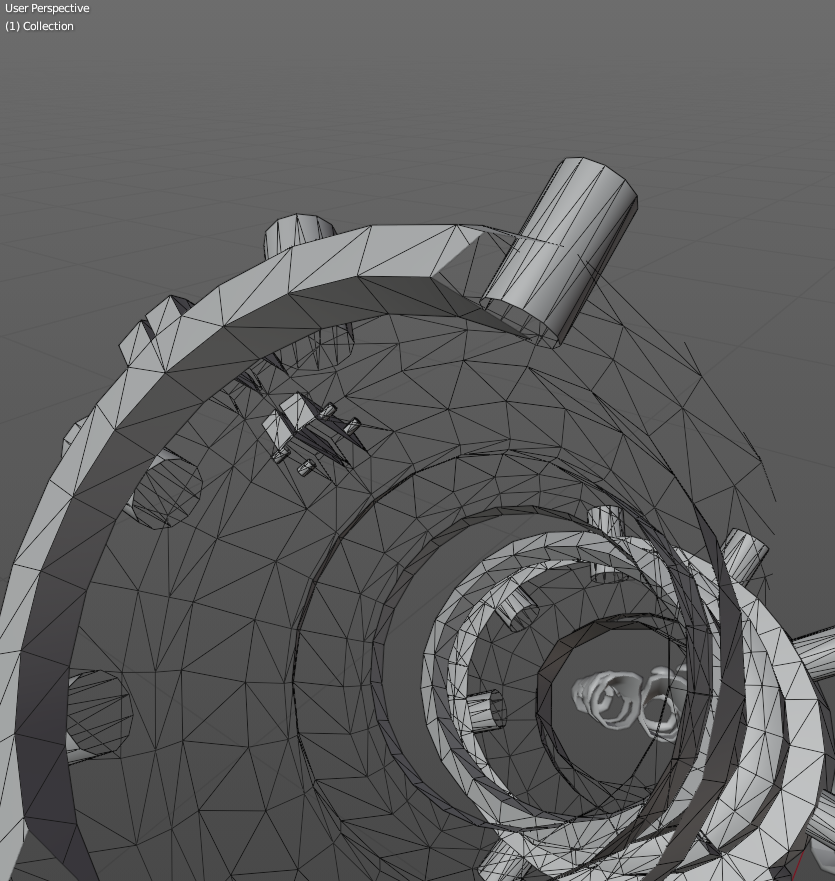
Regretfully, the parts aren’t all complete. As you’d never see this thing off Cloud’s arm, the model doesn’t actually have an ‘inside’ except for the visible lip.
> Games don’t follow the laws of physics
Armour in a game can clip, meaning the pieces can enter each other as if intangible. I don’t think I need to remind you that if your cosplay does that, then something has gone seriously wrong and you might, in fact, be dead.
Also, they may be held together by literally nothing. So you may need to build in allowances or places to attach rope or fabric or something.
> Using very ‘low poly’ models
I briefly touched on this before. But if your model is ‘very low poly’, meaning it has very few surface details and is just kinda….pointy and jagged….and mostly relied on its paintjob to convince you in-game it was more complicated, using it as-is is only really feasible for templating, reference, a base or papekura.
Sometimes, you can use the low detail model to model something higher detail or if the shape is simple enough you can sometimes save time by ‘subdividing’ or ‘smoothing’ it in the 3D software in hopes the computer is able to round it out convincingly.
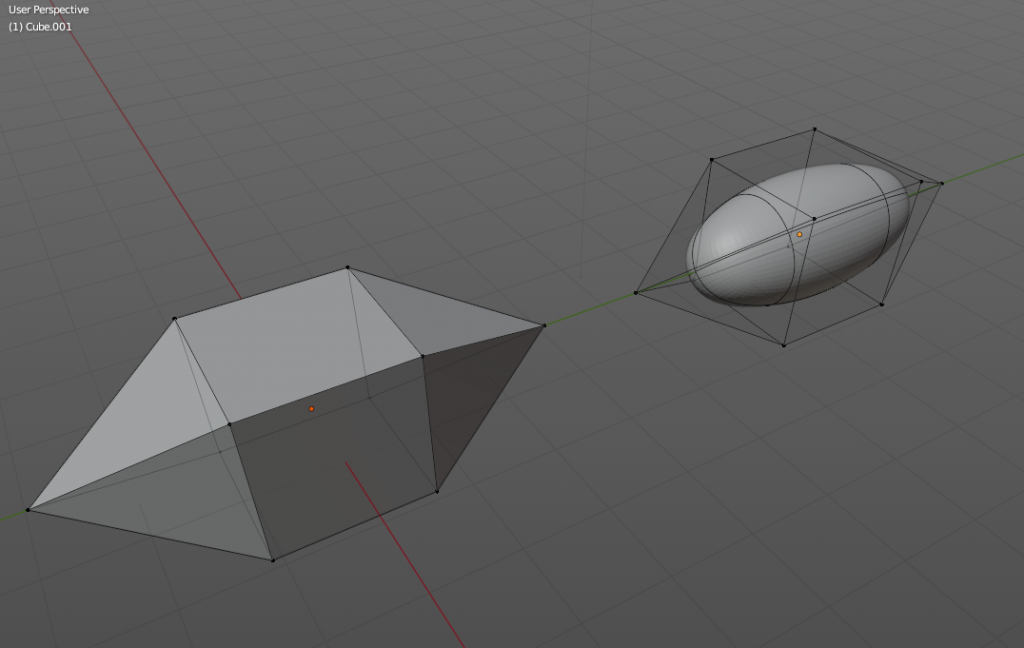
These are both actually the same model, but one has been ‘subdivided’ smooth. This rarely works out of the box except in very simple geometry unless you prep the model first.
In some cases, it might be best to print the low poly model as papekura, tape it into a template and use additive stuff like bondo and/or fiberglass if you have the kit for it. Honestly, this is the absolute best way to go if you want a prop that’ll last you decades. But it’s really rough, dusty, involves volatiles, and a good workshop environment.
By far the most commonly used way to apply papekura templates is to inform cutting foam armour into shape. As the folds needed to turn the one flat thing into a 3D thing also works in large part to convert that flat foam sheet into a 3D foam thing.
Thankfully, there are plenty of tutorials online on how to use 3D models to make a foam template.
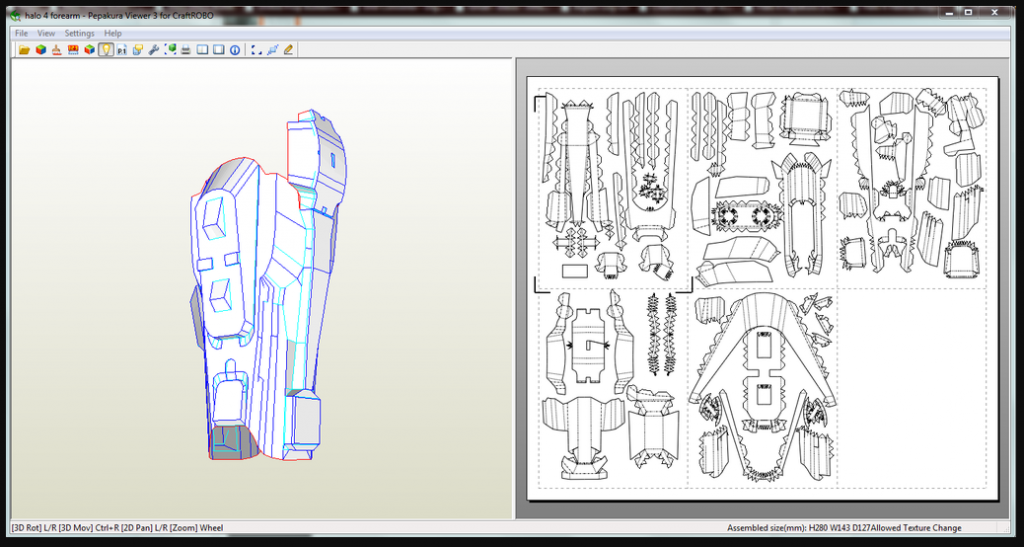
A polygonal model, properly prepared, can be used to make a papekura sheet for use in foam work.
Source “How to make foam armour” on Instructable.com
I got me a high tech PS5 quality 3D model, so I just rip and hit print, right? WRONG.
Remember the bit above about models being optimized for the game? Well, a model that is ‘impossible’ can’t be used for anything. Any model. Low or high poly. So you’ll need to give it detail and fix its sins. We’ll go through that next.
Cleaning Up The Model.
When you get the model, remove anything you don’t want. Depending on how the model was made, this is either easy or a lot of painstaking face selection in your modelling tool.
Sorry, Cloud, but you gotta go. Also, I don’t need your suspenders and belt, I’ll be making those out of not-solid things. 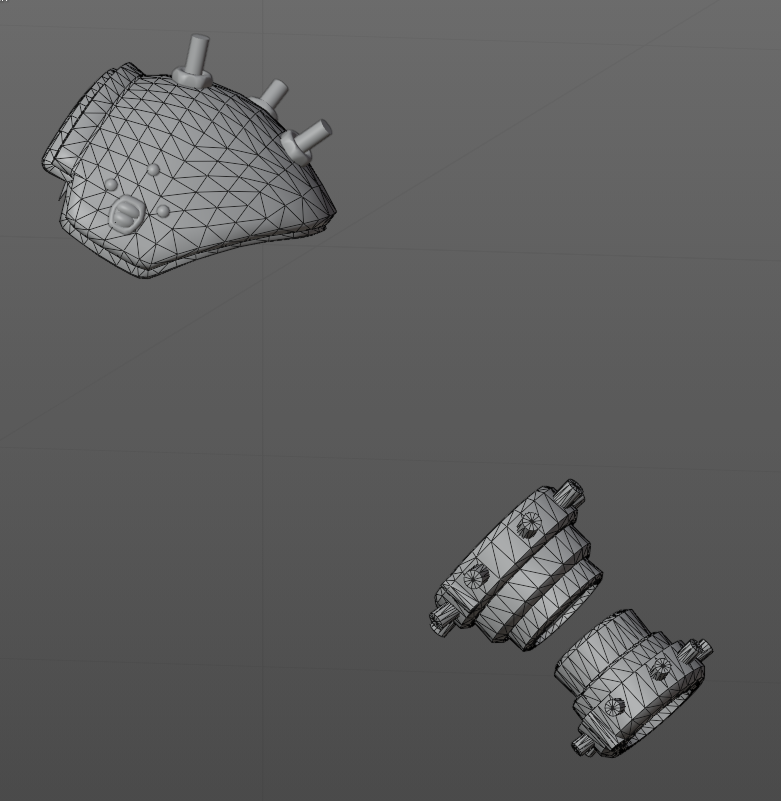
I’ve deleted the Cloud. Sorry Cloud. I only wanted your armour.
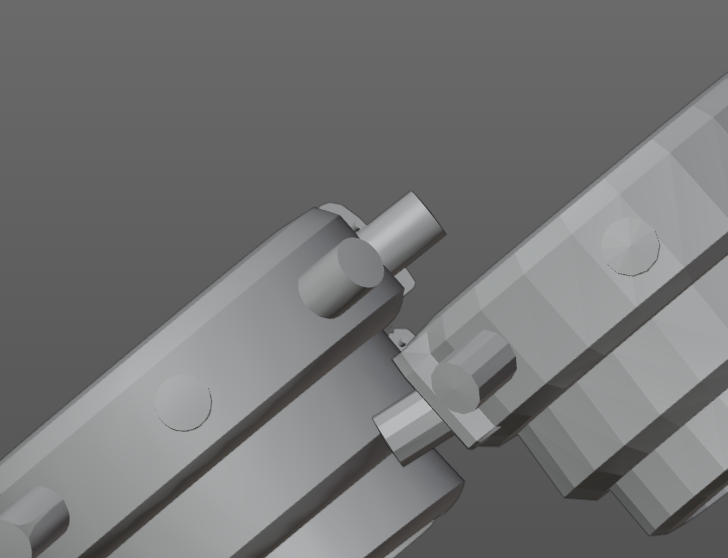
You’ll then need to fill in some blanks. This could be adding faces or whole walls that didn’t exist. Remember that a polygonal face is infinitely thin. Real world things aren’t. So all walls should be formed of enough faces to make up as many faces as they’d have in the real world. If a 3D model has a single face for any of it’s pieces, it won’t work. The bracer above, for example, has no interior faces(the part that would touch an actual arm) only exterior ones, as the player would never see the inside of it. Equally, you may need to add details and bits that were only ever textured on it, such as the nut with the correct sides and bolt threads as seen on the pauldron model.
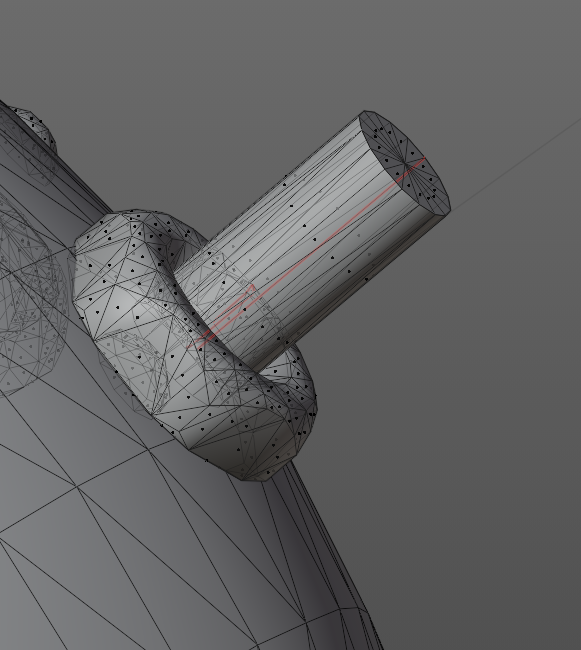
Uhhh, that isn’t what nuts and bolts look like, as here the textures were doing most of the visual work, I’ll delete these and make a a different model for these to print. 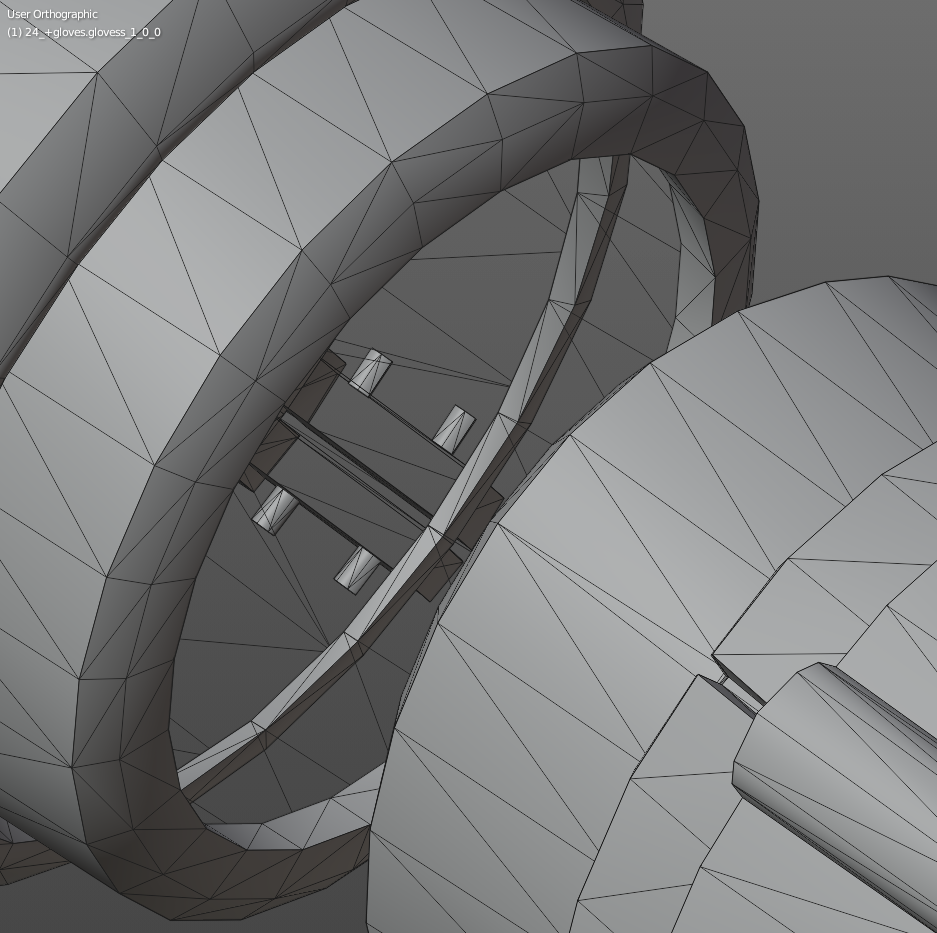
The bracer only has external faces, no interior ones, so basically it’s infinitely thin in places, and therefore ‘impossible’.
In some cases, you may want to rely on conventional cosplay trickery to add stuff like rivets and other details that may be tricky to print. Remember that the conventional FDM 3D printer doesn’t print fine details well. In that case, use the 3D model as the ‘base’ on which to glue on your painted googly eyes, trims, and so forth.
Finally, you’ll either have to resign yourself to printing the model with a lot of plastic ‘walls’ and sanding those sharp edges out or use bevels on the sharper literal edge creases and ‘subdividing’ the model to give it a smoother look by adding more faces procedurally.
Same model, but one was subdivided and ‘smoothed’, while the other wasn’t.
‘Normals’
Normals baically define what the ‘camera facing’ side of the polygon is. Polygons have no concept of thickness, so in order to inform a ‘slicer’, used to prepare a 3D model for printing or CNC work, you need to help it along.
An object is presumed to be ‘solid’ when all it’s walls are comprised of outward facing ‘normals’, which can be considered to be akin to vectors that shoot out the middle of and perpendicular to a polygonal face. 3D modelling software will typically allow you to visualize these as typically they are invisible. You can also enable ‘backface culling’ to make all faces who’s normals are away from you invisible so that they stand out.
To try to make it easier to visualize how slicers treat solidity, here’s a shoddy diagram.
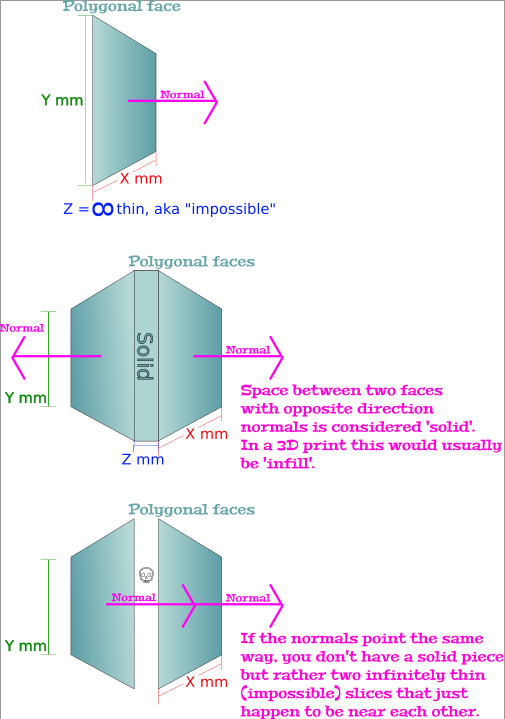
If your model doesn’t slice correctly, make sure your normals are fine. In some software like Blender, it usually suffices to ask it to just ‘recalculate outside’ but you may still need to tweak some by hand in especially messy models.
Use it for 3D Printing!
Once the model is cleaned up and possible, you can try to slice it. And even print it! Depending on the size of the model, you may need to cut it into pieces to fit on your printer bed. You can then glue, fill and smooth the printed object for painting. Meshmixer’s “plane cut” tool is awesome for this.
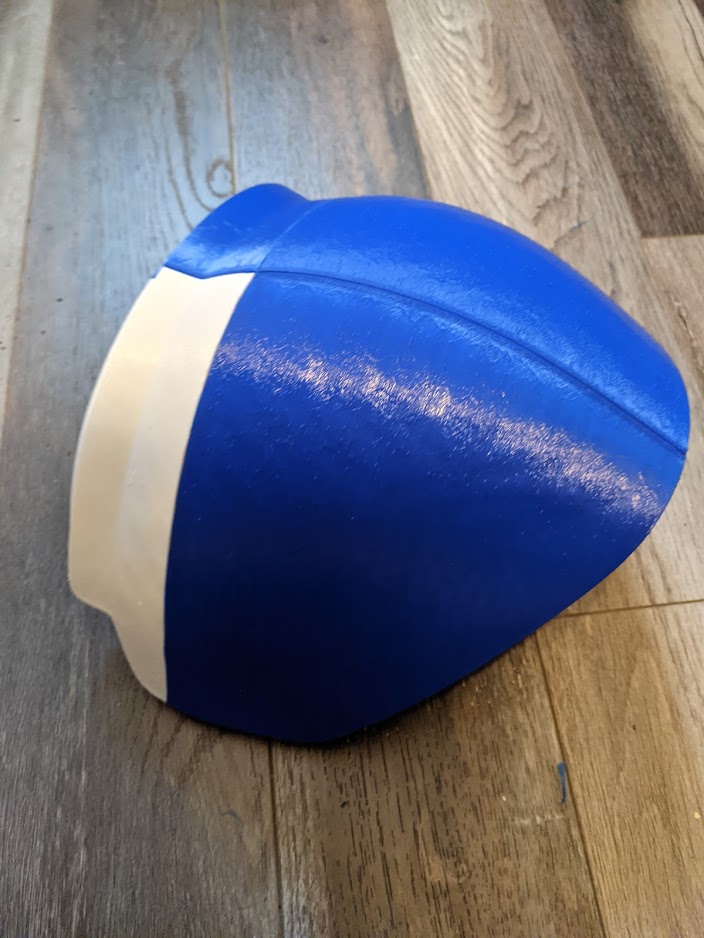
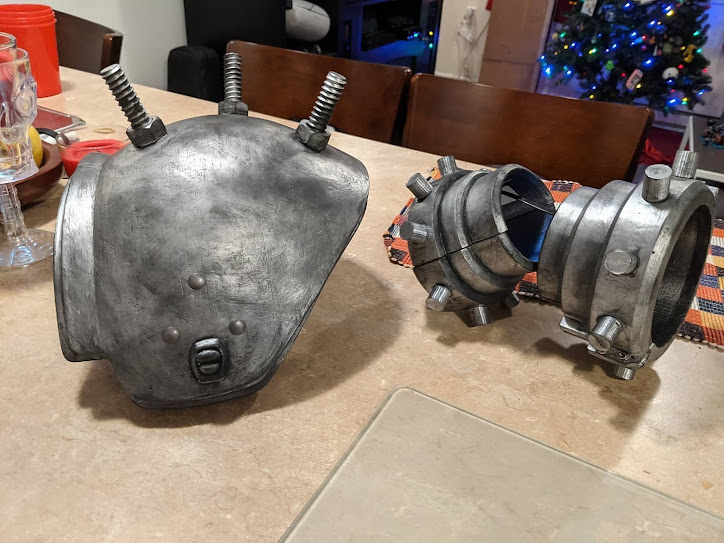
I ran out of blue plastic most of the way through…. 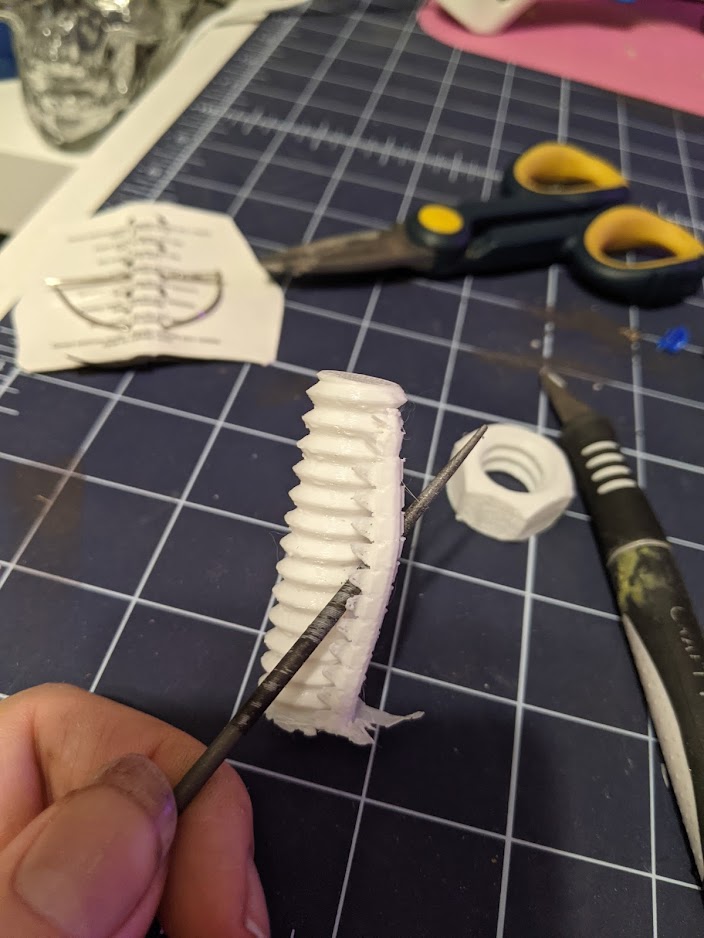
I actually printed a different, more detailed, plastic bolts and nut pair for use on it, as well as individual ‘greeblies’. A good coat of paint makes it look all nice.
But you don’t need to print it!
As you see from the above, it can be a lot of work to use a game model for cosplay or prop making. But sometimes you don’t have to. Honestly, I also use game models to simply have a free form, rotatable reference model for use in more conventional cosplay/prop making. Which might be all you need!
In Conclusion
Okay, so, that was probably more work than some of y’all might have expected. It would be so cool to simply drop a 3D game character model into 3D print software and have an instant cosplay ready prop, but it’s actually more work than the old fashion way. Where it can shine is accuracy. If you put the work in, the prop will look as much like the ‘real thing’ as possible.
But, again, that can be a lot of work.
Whether you still wanna do it is up to your project, your standards, your budget(if commissioning someone, such as myself, to do it) and your skills.
In any case, I hope this post was useful for you!
This girl looks familiar….